Epoxy Flake Chips Floor Coating
Epoxy Flake Chips Floor Coating

Decorative Epoxy Flake Chips Flooring System System is an easy-to-install commercial epoxy floor coating that is applied overcommercial concrete floors.
The Epoxy Flake Flooring kits include enough flake to broadcast them over the wet epoxy flooring to the point of rejection. This installation process allows the installer to throw the flake onto the wet epoxy flooring to the point where the floor is entirely covered up by the flake. The results look great every time because the installer scrapes off the loose flake, leaving a uniform blanket of flake on the entire concrete floor.
There are 50 lbs. of flake included in every two-car garage kit. That ratio is kept as the square footage increases, so every installationwill look great, regardless of square footage. This system is designed to be easily installed by most commercial maintenance staff without the need for extensive training.

Advantages&Features
Fast turnaround time
Moisture insensitive
High temperature resistance
Attractive yet functional
Wide selection of colored chip blends
No moisture testing required
Can be installed on concrete floors in 2 days
Low VOC green products
Non-yellowing
Extremely fast-drying
Can be retarded for more pot-life
Penetrates deep into porous concrete
Abrasion resistant flooring system
Resistant to most chemicals
High-build finish
Hot tire resistant
Uses
Production floors
Animal holding / Vivarium
Chemical Resistance
Epoxy Flake Flooring System is extremely chemical resistant and hot tire resistant. Hot tires will not stain the MTB-3329 Epoxy topcoat used in the Epoxy Flake Flooring System.
The following chemicals were shown to have no effect on 5073 in a chemical staining test: acetone, xylene, 10% HCL, ammonia, degreaser, Liquid Plummer?, vinegar, Clorox, Windex, motor oil, gasoline, Skydrol, and hot tire.
Uses
Production floors
Animal holding / Vivarium
Laboratories
Clean rooms
Rest rooms
Change rooms
Garage
Installation Instruction
A.Materials &EssentialTools you need
--Electornic Blender
--Spiked Shoes
--Spiked Roller
--Gloves
--Squeeze
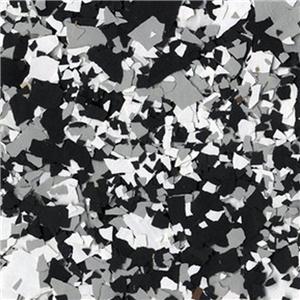
--Color Flake Chips,with the size of 1/8"
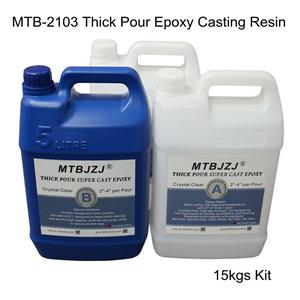
--MTB-3327 Epoxy Primer.2:1,clear,15kgs/kit
--MTB-3328 Epoxy Middle Coat,clear,15kgs/kit
--MTB-3329 Epoxy Top Coat
B.Methods of Preparation for Concrete Coating or
Polishing
When it comes to concrete coating or polishing, it is vital to trust in the experts if you desire a job well done and a floor that will shine for years.
At Liquid Floors, we know exactly what it takes to obtain the floor you want and we have the expertise to make it a reality.
It all begins with proper preparation. As the first step to take in both concrete coating and polishing, preparation is key. Our experts know exactly how important it is to prepare and repair the existing concrete so you can receive the best results from your epoxy coating or concrete polishing.
Beginning with the removal of any stains or residue, our installation team will carefully clean your concrete surface. Following our thorough cleaning processes, we will level and etch the floor using a wide range of equipment, all in the hands of professionals.
At Liquid Floors, we put our expertise to work for you so you will have a floor that you can be proud of and will look great for years to come.
Outlined below are the different steps we take in installing epoxy floor coatings or concrete polishing.
1.diamond grinding
Diamond grinding prepares the concrete for coating. It removes rough spots, contaminants, and older coatings. It does not generate hazardous waste or damage the concrete and creates a perfect surface for coating.
When performed properly, diamond grinding is the least damaging preparation method for your concrete and the ideal prep solution for
2.shot blasting
Shotblasting is used when a floor is in need of major repairs and resurfacing. With a process that involves throwing steel shot directly on the concrete floor, concrete shot blasting
mimics sand blasting in order to level off the floor, remove stains, and remove markings. The process leaves aggressive profiles which allows for floors that are 1/8” or thicker to bond properly to the concrete surface.
3.hand grinding
Hand grinding is a crucial step to insure a proper bond of the epoxy all the way to the available edge. Failing to prep as close to the edge as possible can lead to coating failure. Detail work, that if overlooked, could cost you later.
4.sanding
After epoxy floors are in place, proper sanding is important. When performed correctly, sanding creates a stronger mechanical bond between the epoxy and urethane top coat – producing longer lasting results with greater durability and improving aesthetics.
5.scrubbing
Once the grinding is complete, a thorough cleaning of the surface is required to ensure the concrete coating adheres properly. This begins with an in-depth scrubbing to remove all major dirt, grit, and debris.
6.Vacuuming
Nothing can sabotage a floor resurfacing project as easily as dirt, grit, and other debris. It is essential that floors are vacuumed properly to insure maximum adhesion and improved aesthetics.
Using HEPA filters helps reduce dust and particles from the air and keep the surface as clean as possible.
7.JOINT CAULKING
Effective caulking protects the sidewalls of the joints to keep them from deteriorating. Additionally, joints that have not been caulked allow dirt and debris to get trapped – making them more difficult to clean. Cleaning and caulking joints is an important step to protect joints and give cleaned and coated floors a finished look.
C.Process of Epoxy Flake Chips Flooring
The whole process you need
1)MTB-3327 Epoxy Primer
2)MTB-3328 Epoxy Middle Coat/Base Coat
3)Color Flake Chips
4)MTB-3329 Epoxy Top Coat
Mixing and Application
When the flooring system is a thin mil coating or slurry system, a primer must be applied to the concrete prior to the application of base coat. This will prevent issues related to outgassing from the slab and to have a good seal of the surface. Premix 3327A (resin) and 3327B (hardener) separately,using a low speed elctronic blender. Mix for 1 minute and until uniform, exercising caution not to whip air into the materials.
MTB-3327 Epoxy Primer
Add2 parts 3327A (resin) to 1 part 3327B (hardener) by volume. Mix with low speed electronic blender for three minutes and until uniform. DO NOT mix more material than can be used within 4 hours. Apply material with a short spiked roller at a spread rate of bdd sq. ft. per gallon.
do not allow to puddle. Any uneven or textured surfaces will require more material than an even surface.
Immediately pour mixed material onto the substrate and pull out using a pin rake, screed rake or flat trowel. Use a spiked roller to evenly
distribute material.If concrete displays excess outgassing, use a squeeze to break bubbles. Allow material to self-level (5-10 minutes).
Allow to cure 6-8 hours, must be hard enough to stand or walk on without leaving marks.
MTB-3328 Epoxy Middle Coat and Flake Chips
Mixing and Application
1. Sand or grind surface of dried MTB-3327 Epoxy Primer to provide proper intercoat adhesion with bonding coat if need
2. Premix 3328A (resin) using a low speed electronic blender. Mix for one minute and until uniform, exercising caution not to whip air into the materials.
3. Add 2 parts 3328A (resin) to 1 part 3328B (hardener) by volume. Mix with low speed electronic blender for three minutes and until uniform.
Apply material using a 1/4” spiked roller at a spreada rate of 160 sq. ft. per gallon.
4. Spread the Flaked Chips over the MTB-3328 ,about 50 kgs per 1000 square feet). Broadcast floor within 20-30 minutes of placement.
5.Allow to cure for a minimum of 6-8 hours. All imperfections such as high spots should be smoothed before the application of the grout coat.
note:do not throw downward at a sharp angle using force.
MTB-3329 Epoxy Top Coat
Mixing and Application
1. Premix 3329 (resin) using a low speed electronic blender. Mix for one minute and until uniform, exercising caution not to introduce air into the material.
2. Add 2 parts 3327A (resin) to 1 part 3327B (hardener) by volume. Mix with low speed electronic blender.for three minutes and until uniform. To insure proper system cure and performance, strictly follow mix ratio recommendations.
3.Apply 4686 using a 1/4” spiked roller at a spread rate of 800 square feet per gallon, evenly, with no puddles making sure of uniform coverage. Take care not to puddle materials and insure ven coverage.
4. Allow to cure 24 hours minimum before opening to traffic. In cool and/or high humidity conditions, a surface film may form which can be washed with soap and water.
Cleanup
Clean up mixing and application equipment immediately after use. Use toluene or xylene. Observe all fire and health precautions when handling or storing solvents.
Safety
Refer to the MSDS sheet before use. All applicable federal, state, local and particular plant safety guidelines must be followed during the handling and installation and cure of these
materials. Safe and proper disposal of excess materials shall be done in accordance with applicable federal, state, and local codes.
Material Storage
Store materials in a temperature controlled environment (50oF - 90oF) and out of direct sunlight.
Keep resins, hardeners, and solvents separated from each other and away from sources of ignition.
Maintenance
Occasional inspection of the installed material and spot repaircan prolong system life. For specific information, contact the Technical Service Department.
Disclaimer
The information and recommendations set forth in this document are based upon tests conducted by or on behalf of The Sherwin-Williams Company. Such information and recommendations set forth herein are subject to change and pertain to the product(s) offered at the time of publication. Published technical data and instructions are subject to change without notice. Consult www.glue-adhesive.com to obtain the most recent Product Data information and Application instructions.
Warranty
The Shenzhen Meitaibang Chemical Co,Ltd Company warrants our products to be free of manufacturing defects in accord with applicable Sherwin-Williams quality control procedures. Liability for products proven defective, if any, is limited to replacement of the defective product or the refund of the purchase price paid for the defective product as determined by Shenzhen Meitaibang Chemical Co,Ltd, No other warranty or guarantee of any kind is made by sherwin-williams, expressed or implied, statutory, by operation of law or otherwise, including merchantability and fitness for a particular purpose.